
In the mid of 2013 I wrote a post about recovering a deleted, BitLocker enabled Partition using Windows Server 2012. Back then the state of the art encryption method was AES 128. Now that we got Windows 10 and XTS-AES 256 encryption some people seem to have problems running through the steps of the old article. That’s why I decided to spend some time to try this on a modern OS with modern encryption.
So this time, to save me some time, I used a 5GB VHD file lying on a bunch of SSDs. In real life the whole process may take several hours to several days, depending on your machine, the size and speed of your disk and also on the number and size of the files you want to restore. Here we go…
If you want to try this at home I included the steps for creating the VHD as well.
First thing we need is an elevated command prompt. Go to you startmenu, type cmd, right click “Command Prompt” and choose “Run as administrator”. Then open a disk management console by typing diskmgmt.msc.
Windows 10 Disk Management
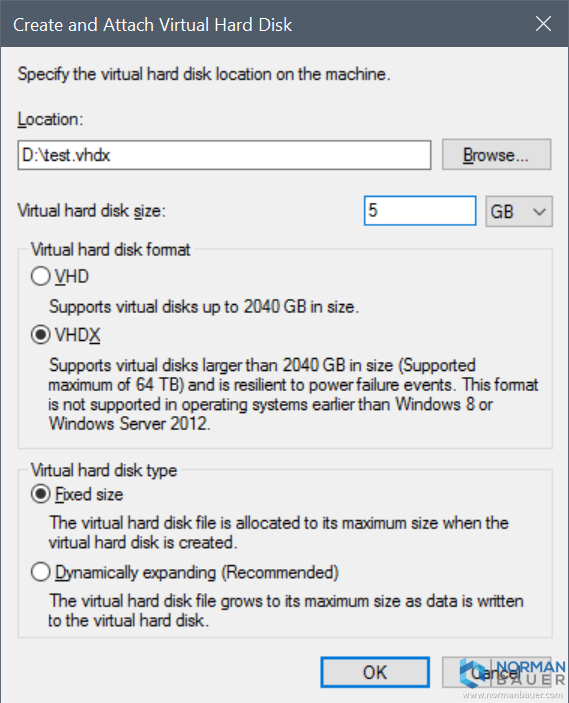
To create and attach a VHD go to the Action menu and select “Create VHD”.
Create and Attach Virtual Hard Disk
Now the disk management console should list the attached VHD:
Windows 10 Disk Management with attached VHD
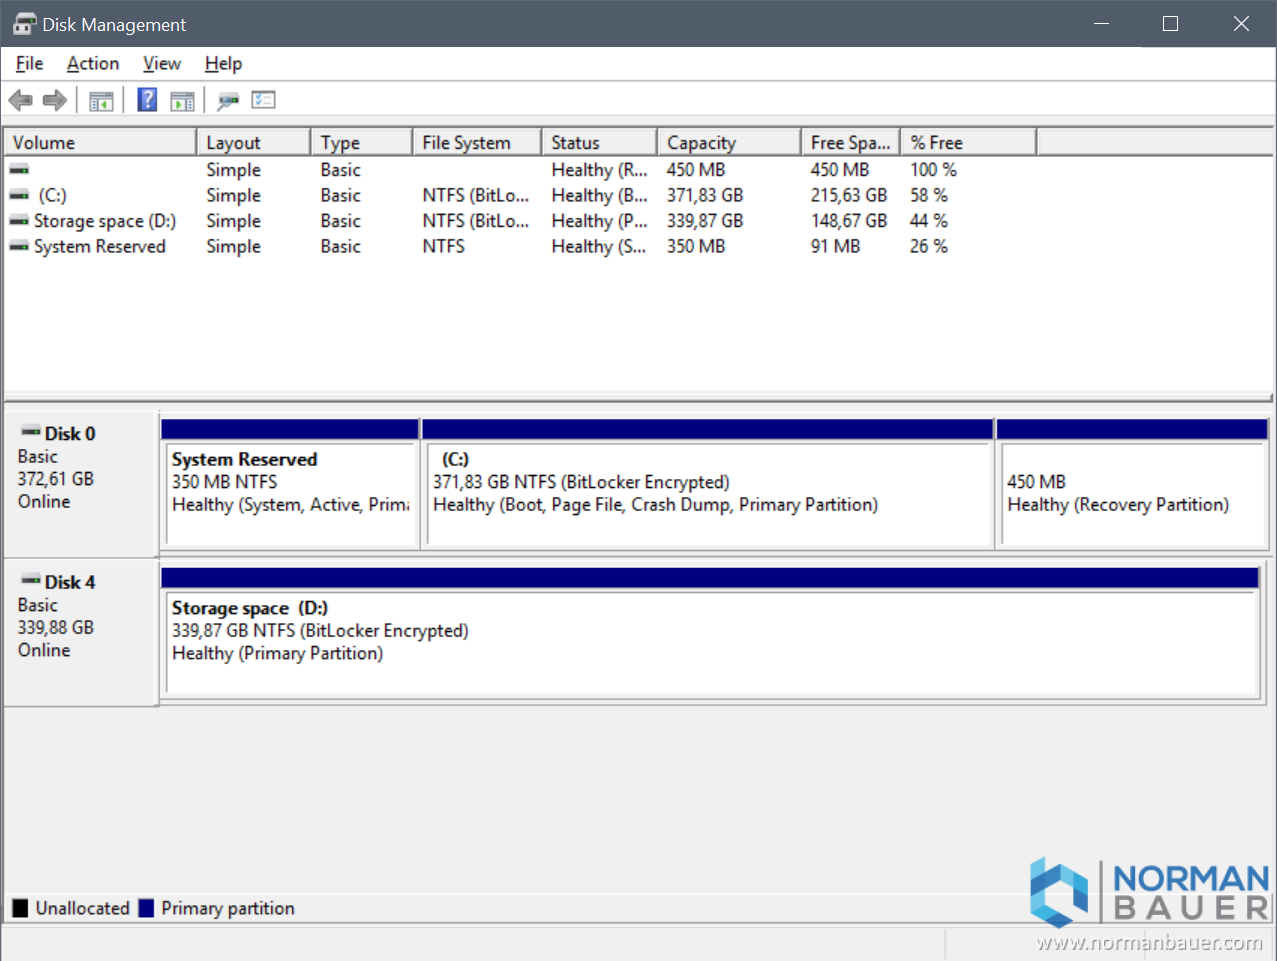
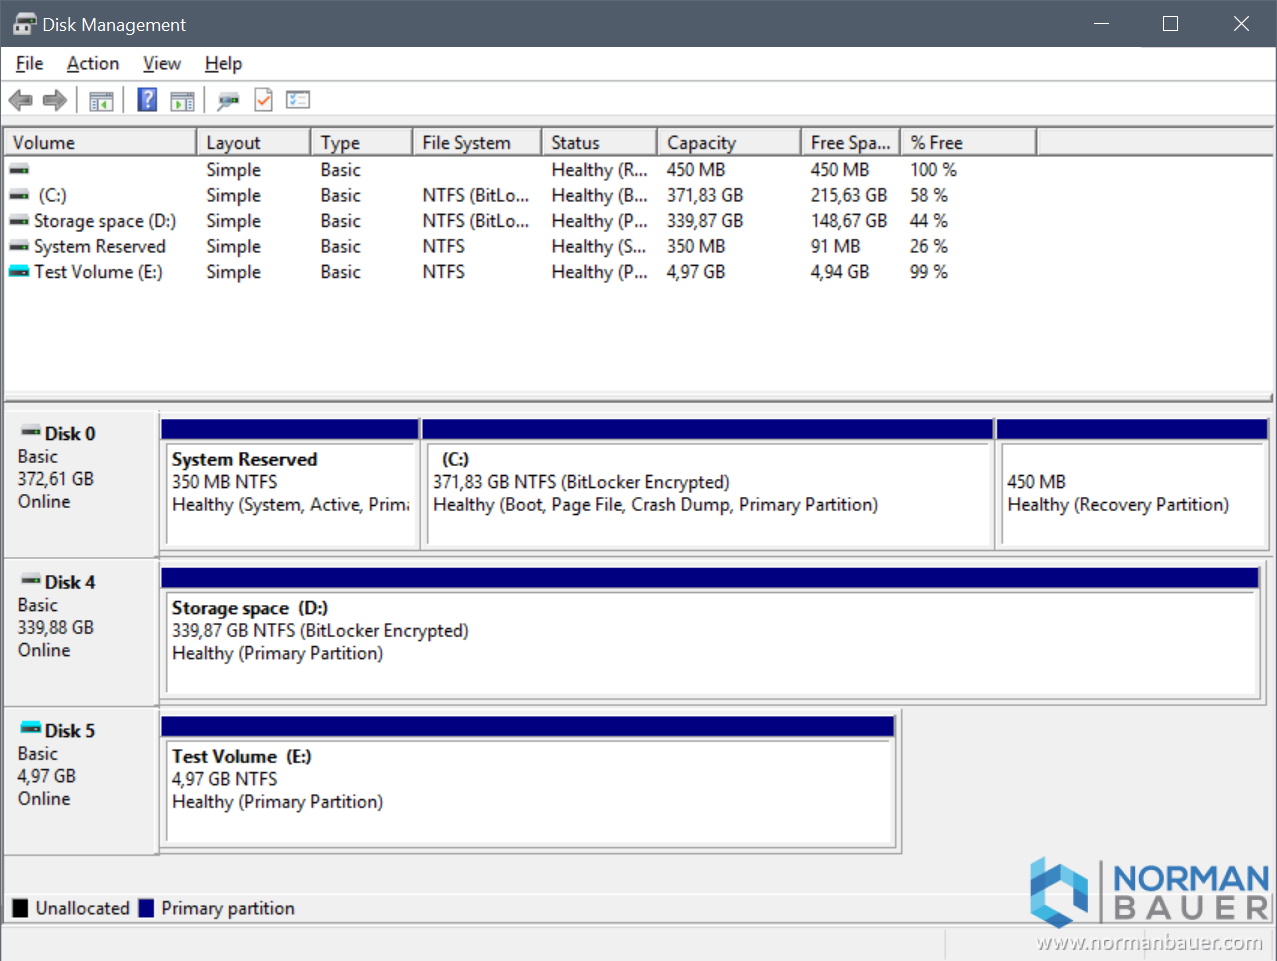
As we want to actually encrypt, destroy, decrypt and recover data we need to create a volume by initializing the disk first:

Windows 10 Disk Management Initialize Disk
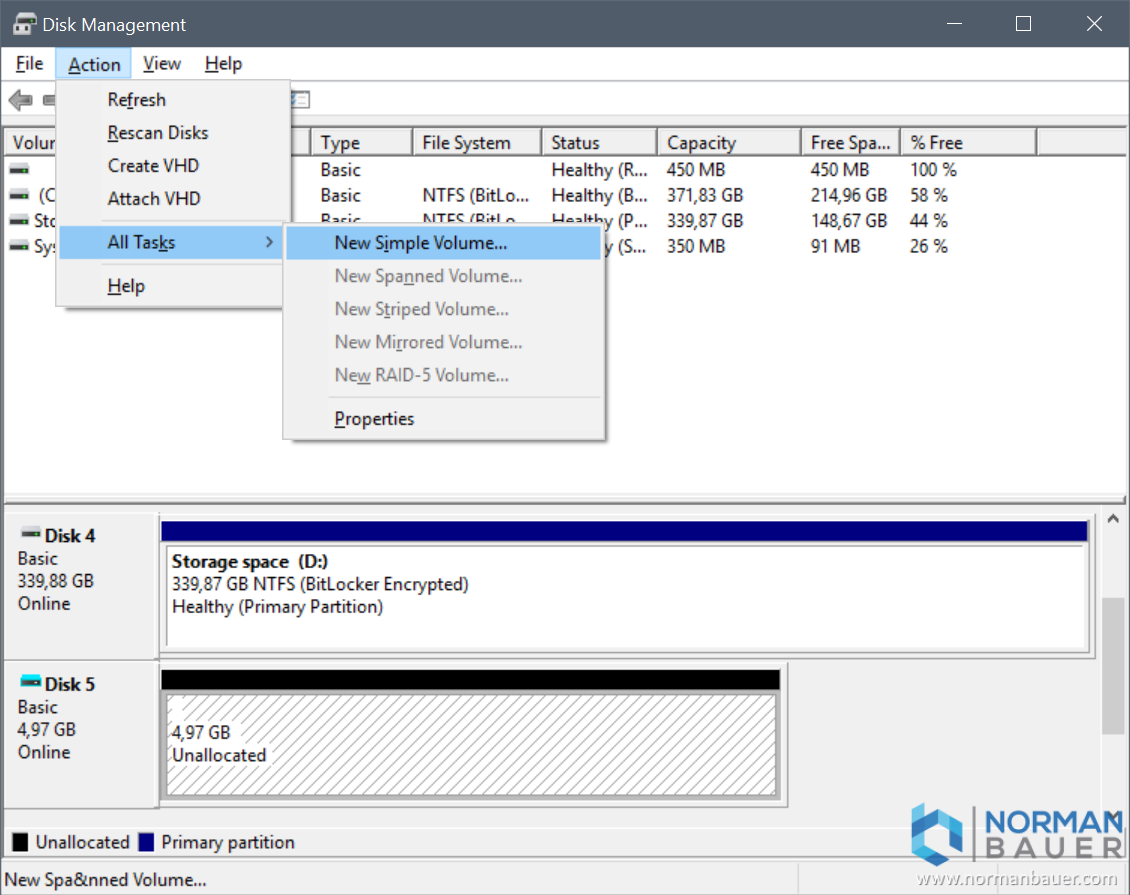
Windows 10 Disk Management New Simple Volume
Please walk through the “New Simple Volume Wizard” step by step. Assign a drive letter and note that one for later. Perform a quick format using NTFS.
In the next step I simply copied an existing ISO file to the newly created volume. Just to have some date on it…
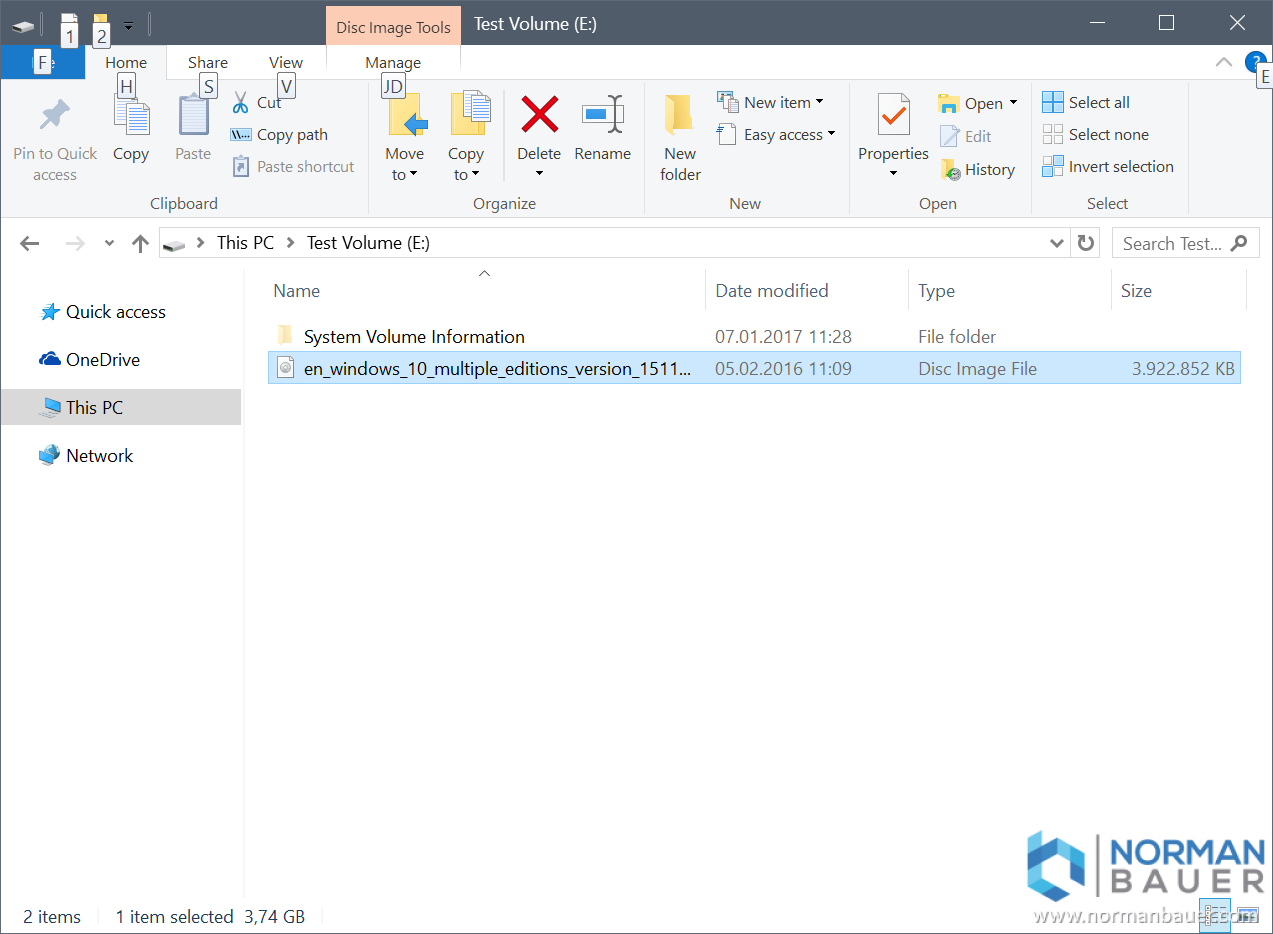
Data on the newly created volume
Now that we have a volume we want to encrypt it. I just checked my group policy settings for BitLocker Drive Encryption which is configured to use XTS-AES 256-bit encryption method for operating system drives, fixed data drives and also removable drives:
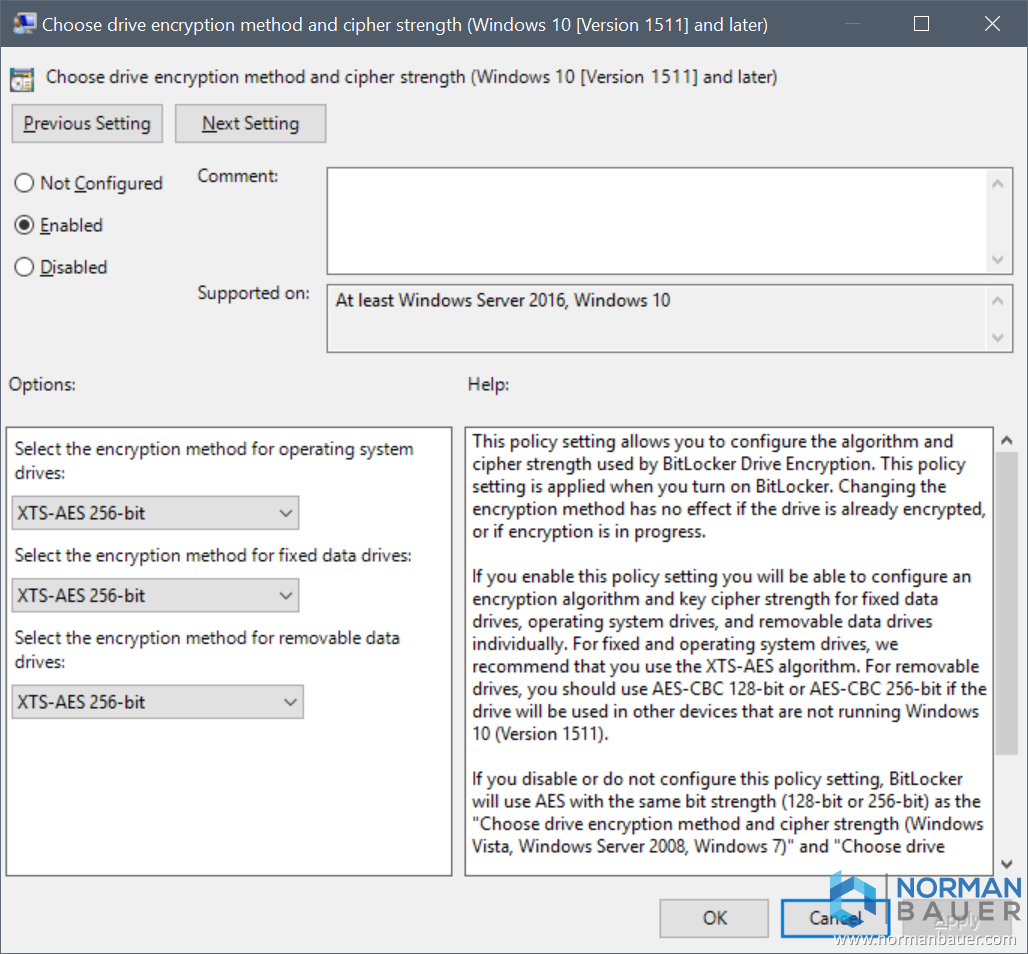
BitLocker Group Policy Choose drive encryption method and cipher strength
It’s time to encrypt the volume! Go to the command prompt and type
manage-bde -on e: -rp -usedspaceonly

manage-bde -on e: -rp -usedspaceonly
This will encrypt the used space only of volume e: using a recovery password that you should make a note of – you will need it later. Since I am running a domain joined lab, my recovery key gets backed up to Active Directory:
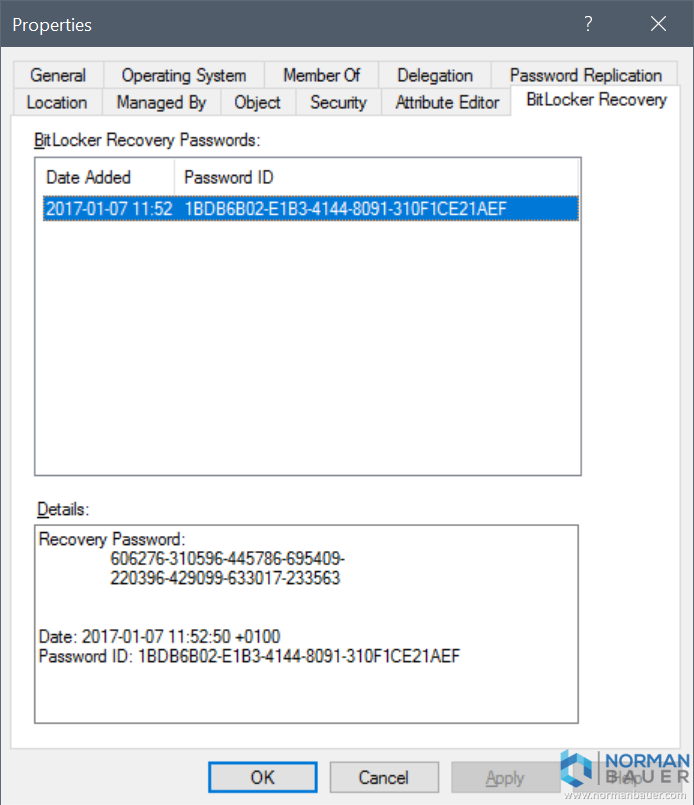
Active Directory BitLocker Recovery Passwords
When the encryption is completed you should see something like this when running
manage-bde -status e:

manage-bde -status e:
Like in 2013 I somehow managed to “accidentally” delete the volume (not the VHD file) and to somehow click yes twice:
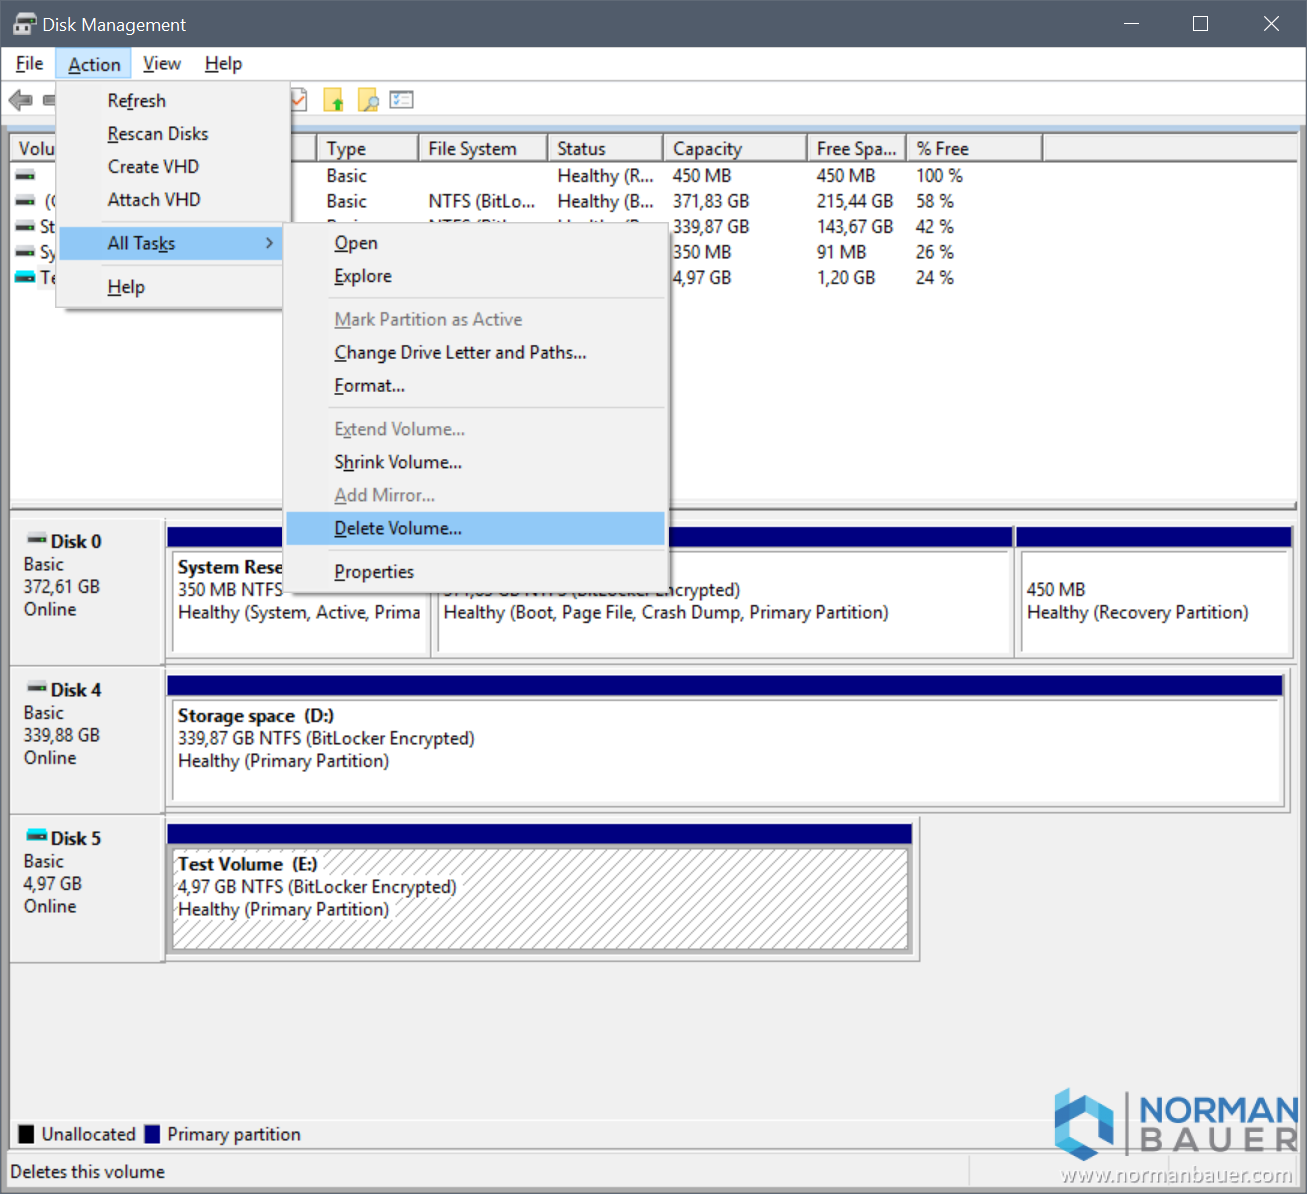
Windows 10 Disk Management Delete Volume
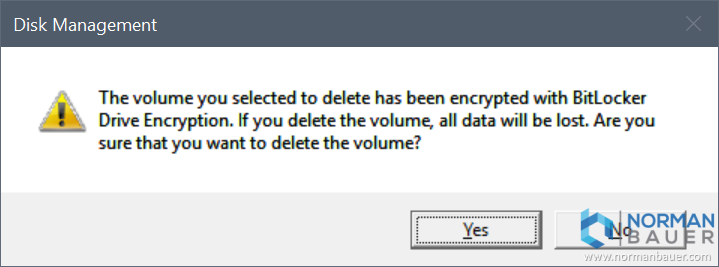
Are you sure that you want to delete a BitLocker encrypted volume
Now that the volume is deleted we’ll start the recovery process. By the way, it doesn’t matter if you deleted the whole volume or just a partition. The process is the same.
First create a new simple volume. This volume has to be the exact same size like the one that has been deleted. If you used the complete disk you are fine… When creating the new volume please make sure to not format the volume!
Windows 10 Disk Management New Simple Volume
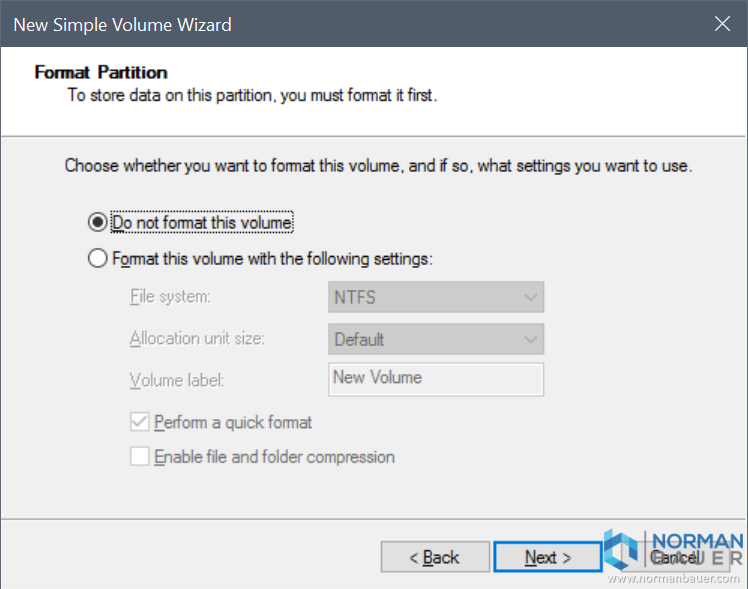
New Simple Volume Wizard Do not format this volume
In the end the wizard will try to open the newly created volume in explorer. Since the volume ist still crypted and has a raw file system at the moment Windows Explorer will ask you to format the volume, but just don’t!!

E is not accessible. The volume does not contain a recognized file system

You need to format the disk in drive E before you can use it
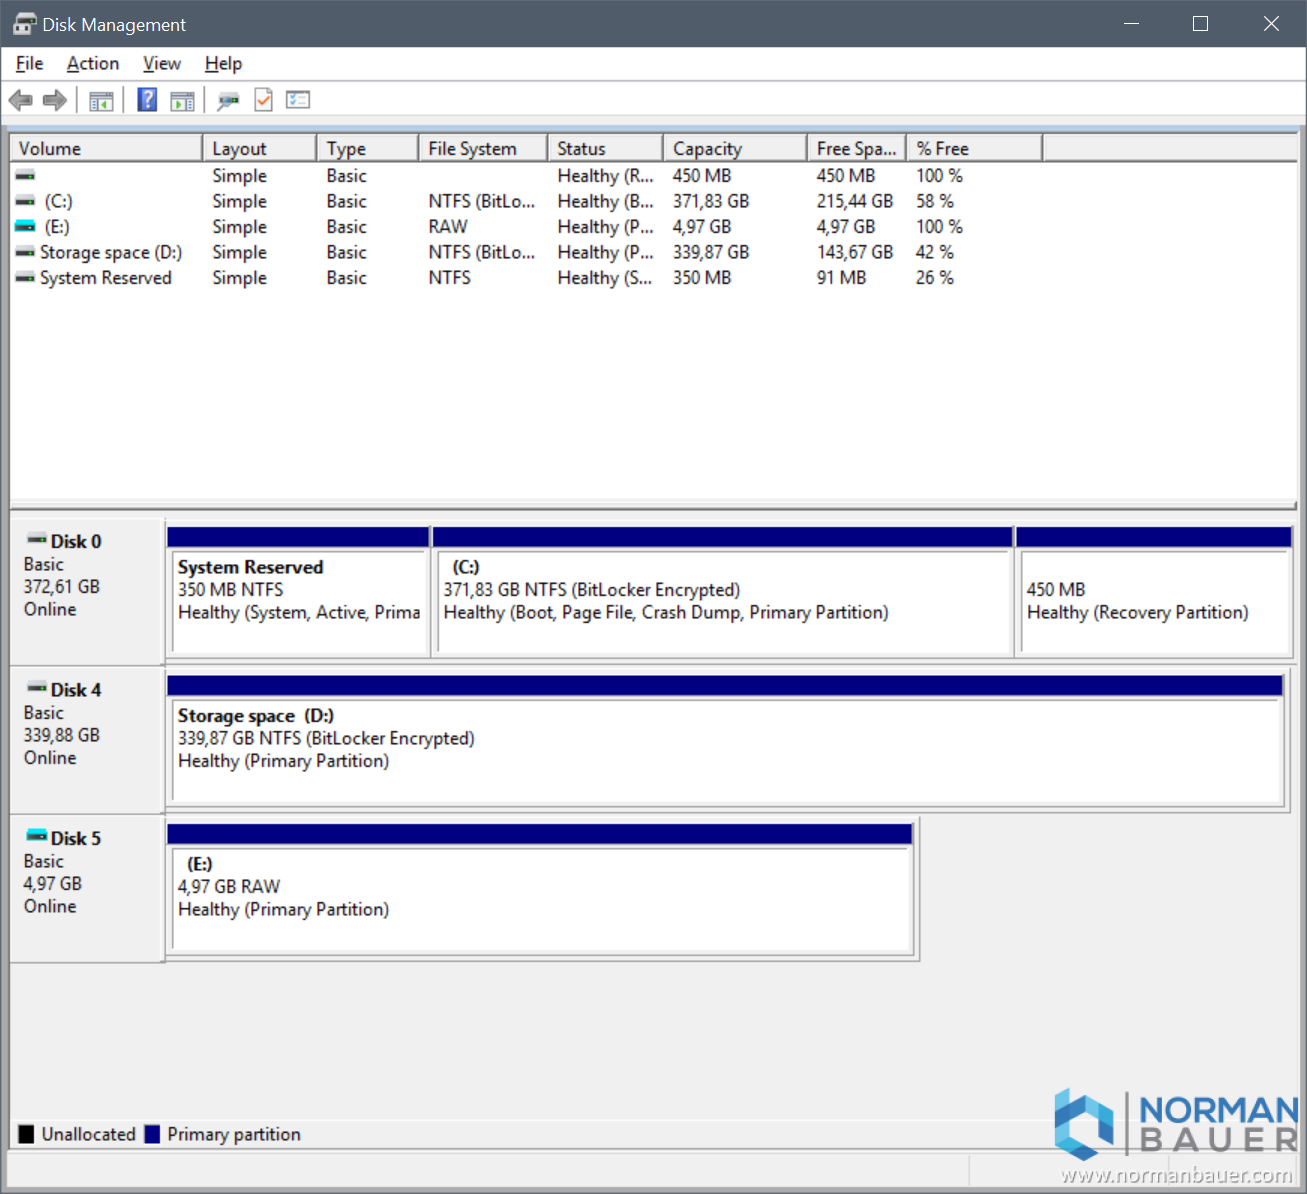
Windows 10 Disk Management with attached VHD and RAW filesystem
In the next step go to the elevated command prompt and type:
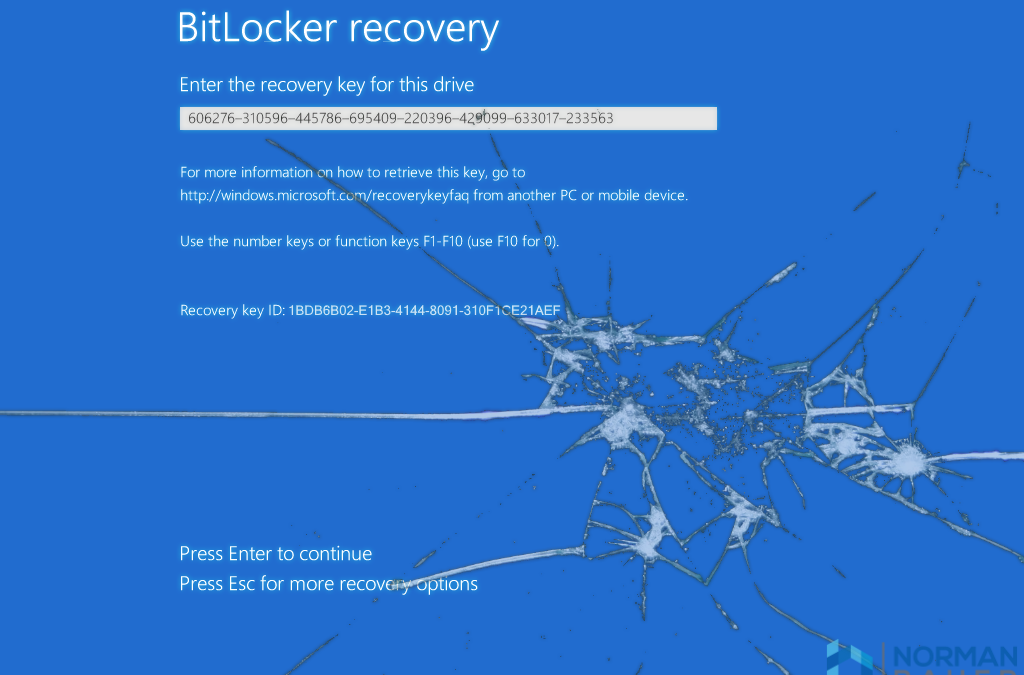
repair-bde E: D:\recover.img -rp 606276-310596-445786-695409-220396-429099-633017-233563
Substitue E: with the driveletter you chose when creating the new volume, D:\recover.img with a filename on a drive offering free diskspace of the size of the “lost” volume and substitue the recovery key in this example with yours.
If the BitLocker Drive Encryption: Repair Tool shows an error and advises you to use the -force option do so by typing:
repair-bde E: D:\recover.img -rp 606276-310596-445786-695409-220396-429099-633017-233563 -force

repair-bde E: D:\recover.img -rp 606276-310596-445786-695409-220396-429099-633017-233563 -force
If this step failed check your recovery key and check everything else twice! The command has to finish decryption or you cannot go on and your data may be lost! This step may take several hours!
The BitLocker Drive Encryption: Repair Tool created the file D:\recover.img containing all the lost data. Windows 10 knows img files and can open them with the Windows Explorer. But unfortunately not this type of img file. When you try to mount it in Windows Explorer you’ll get an error and nothing else happens:
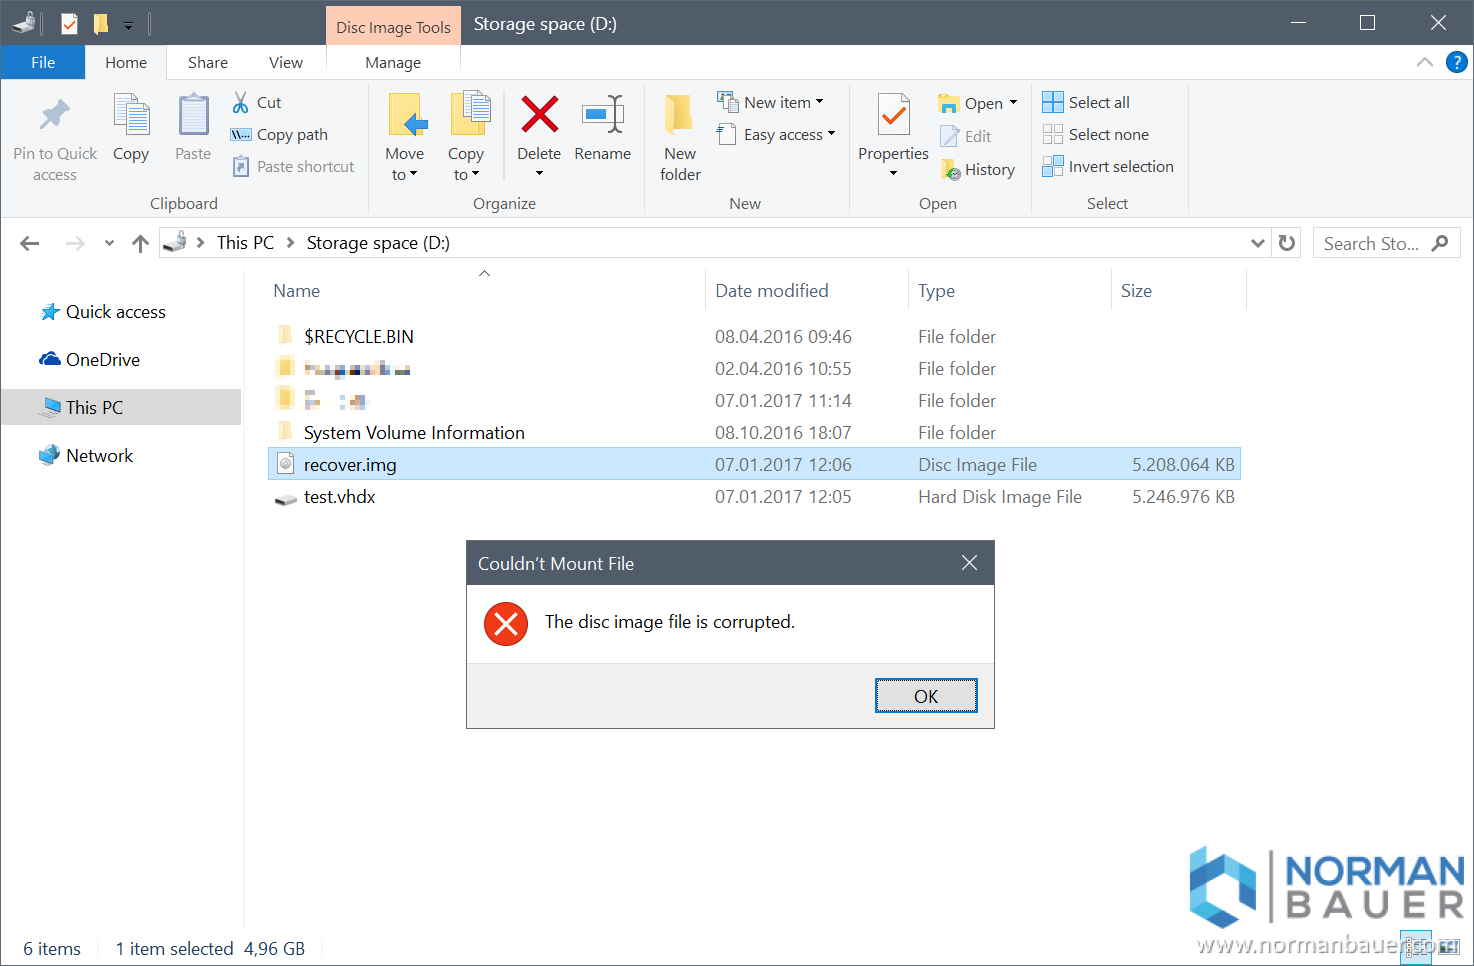
Windows Explorer: The disc image file is corrupted
This is the time to install 7-zip (http://www.7-zip.org/). This small tool can open img files created by the BitLocker Drive Encryption: Repair Tool:
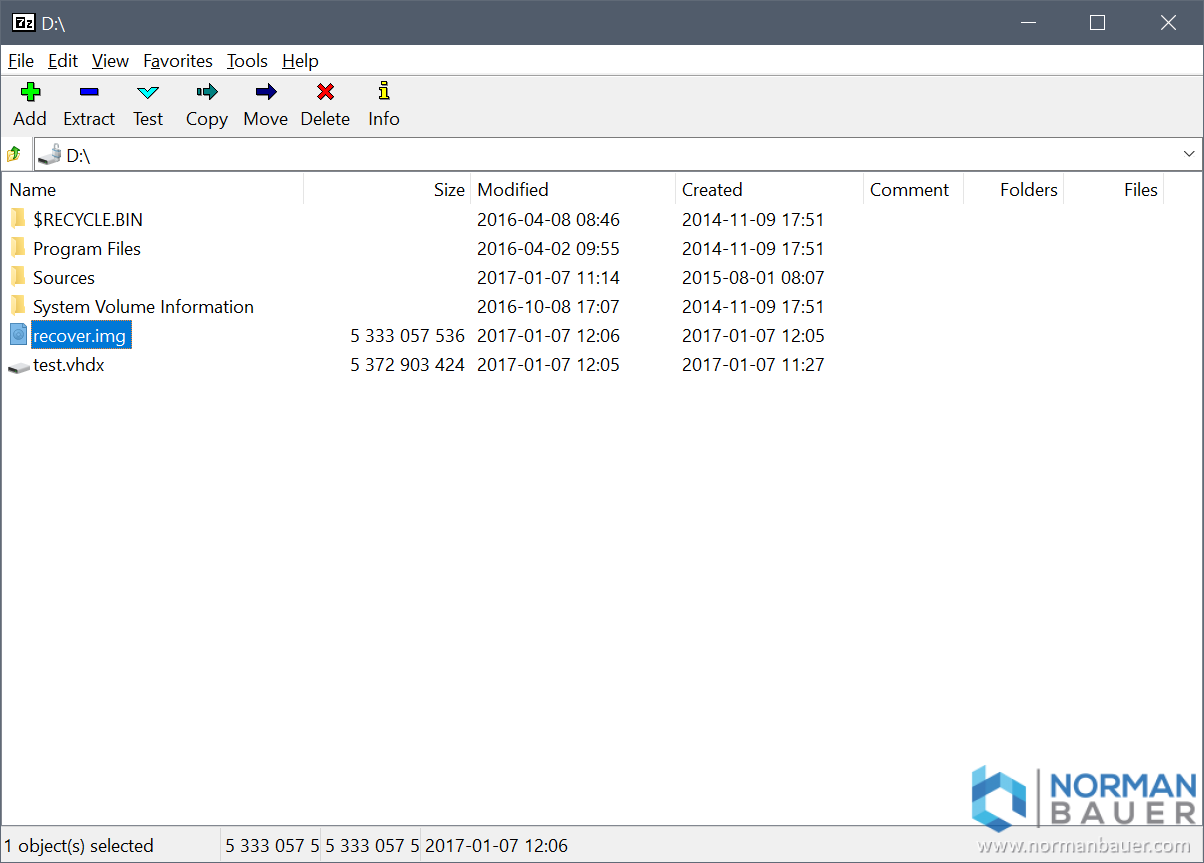
7-zip recover.img
You can now extract all your data to a location of your choice: Select everything you need in 7-zip and hit the “Extract” button. Again, this can take several hours… After that check your data, check the folders and the files. If all your data has successfully been recovered you can finally format the lost partition, copy your data and enable BitLocker again:

7-zip recovered data

Recent Comments